21行目 MaxUser=(最大接続人数を入れます)
15 ; MaxUser. The maximum number of simultaneous listeners allowed.
16 ; Compute a reasonable value for your available upstream bandwidth (i.e. if
17 ; you have 256kbps upload DSL, and want to broadcast at 24kbps, you would
18 ; choose 256kbps/24kbps=10 maximum listeners.) Setting this value higher
19 ; only wastes RAM and screws up your broadcast when more people connect
20 ; than you can support.
21 → MaxUser=30
最大リスナー数は回線の上りスピードで決まります。
回線スピード測定サイト
① Yahoo! BB - スピードチェック ② Studio Radish ③ BNRスピードテスト 等
(①と②は上りと下り同時に測定 ・ ③は上りと下り個別に測定です)
ここで自分のPCの上り回線スピードをはかります。
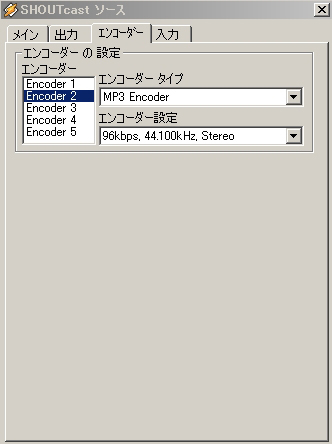
上り回線スピードkbps÷固定ビットレート64kbps=リスナー数
例)ADSLで1mbpsだとすると、mb(メガバイト)=1000KB(キロバイト)なので、
1000kbps÷64kbps=15.62人 15人までは安定して放送できます。
この辺は、リスナー数を多くすると回線スピードによって音が途切れたりするので、
余裕を持った数字にした方がベスト。
光回線10mbpsだとすると、10000kbps÷64kbps=156人 になります。
29行目Password= (パスワードを設定します)
23 ; Password. While SHOUTcast never asks a listener for a password, a
24 ; password is required to broadcast through the server, and to perform
25 ; administration via the web interface to this server. This server should
26 ; consist of only letters and numbers, and is the same server your broadcaster
27 ; will need to enter in the SHOUTcast Source Plug-in for Winamp. THIS VALUE
28 ; CANNOT BE BLANK.
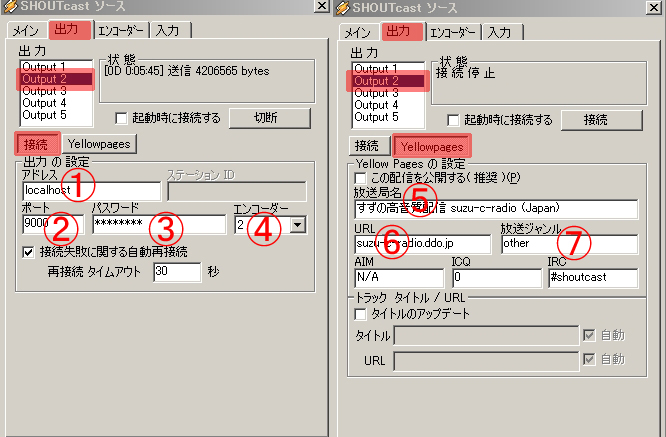
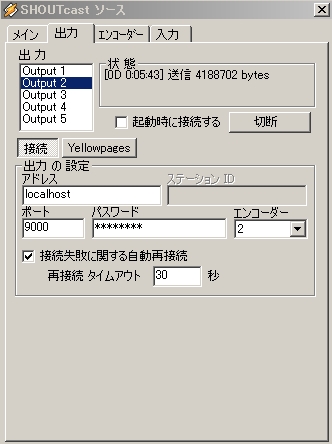
29 → Password=0000
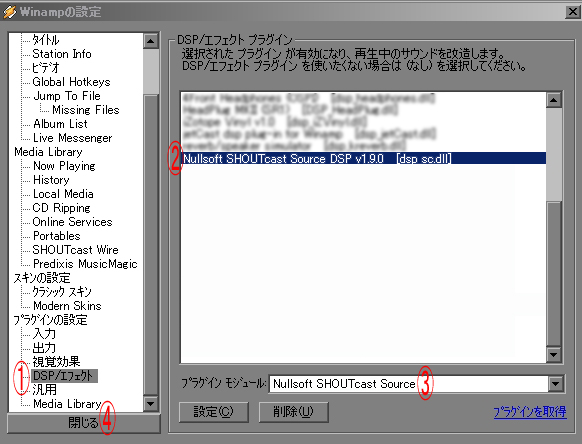
このパスワードは SHOUTcastDSP の設定で使います
37行目PortBase=(使用ポートの設定をします)
31 ; PortBase. This is the IP port number your server will run on. The
32 ; value, and the value + 1 must be available. If you get a fatal error when
33 ; the DNAS is setting up a socket on startup, make sure nothing else on the
34 ; machine is running on the same port (telnet localhost portnumber -- if you
35 ; get connection refused then you're clear to use that port). Ports < 1024
36 ; may require root privledges on *nix machines. The default port is 8000.
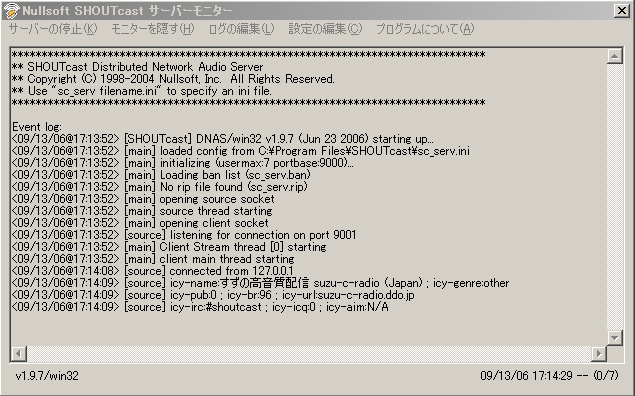
37 → PortBase=8000
ポート番号は音楽が配信されるポートX番と、X番に1足したソース用ポートが必要です。
port3939を利用する場合、port3940 も必要なので、ファイヤーウォールで開放する
必要があります。(1足したポートは書く必要ありません)。
デフォルトでは port8000 になっていますが、悪意のあるユーザーに狙われやすいため
必ず別の番号を指定してください。
143行目AdminPassword=(アドミンパスワードを設定します)
135 ; AdminPassword. This password (if specified) changes the
136 ; behavior of Password to be a broadcast-only password, and
137 ; limits HTTP administration tasks to the password specified
138 ; here. The broadcaster, with the password above, can still
139 ; log in and view connected users, but only the AdminPassword
140 ; will grant the right to kick, ban, and specify reserve hosts.
141 ; The default is undefined (Password allows control for both
142 ; source and admin)
143 → ; AdminPassword=XXXX
143 → ; AdminPassword=XXXX → 書き換える(;_を削除して XXXX部分を書き変える) → 下の行へ
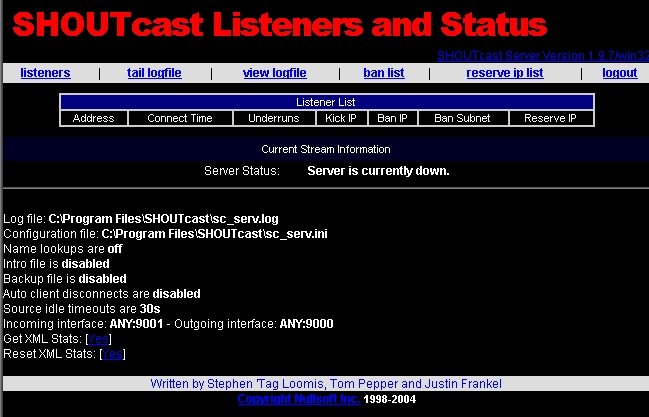
143 → AdminPassword=XXXX
このパスワードは ShoutcastServer の管理画面で使います
198行目PublicServer=(neverは非公開 defaultは公開)
195 ; PublicServer can be always, never, or default (the default, heh)
196 ; Any setting other than default will override the public status
197 ; of the source plug-in or of a SHOUTcast server that is being relayed.
198 → PublicServer=default
198 → PublicServer=never にすれば非公開
(デフォルトだと、http://yp.shoutcast.com/ に表示されますので、公開したくない人は変更してください。)
229行目を変更すると
好まないリスナーを排除するファイルを読み込むことが可能です。
詳しくは下記の管理ページのところに書いてあります。
入力が終わったら 上書き保存をして 閉じます 。